In the realm of precision measurement, instruments that serve to measure diameter function as the veritable sentinels of accuracy. Diameter, the distinguishing measure across circular objects, provides integral insights across myriad fields, from engineering to medicine. Various instruments have been conceived and refined over the years, each with its own characteristics and applications. This discourse elucidates the primary instruments employed to measure diameter, exploring their essence and the unique appeal they bring to the artistry of measurement.
To commence, we delve into the venerable caliper, a tool that embodies the intersection of simplicity and sophistication. Calipers can be as rudimentary as the classic vernier caliper, or as complex as the digital caliper, imbued with electronic precision technology. The vernier caliper, with its dual scales—a primary and a subordinate—invokes the fascination of users as they attempt to discern measurements down to fractions of a millimeter. Consider it a linguistic duality in measurement; the primary scale denotes mental arithmetic while the vernier scale offers a peek into the infinite. The digital variant, conversely, abstracts this cognitive task. It displays numbers with an ease akin to reading a digital clock, liberating the user from the shackles of manual calculations.
Another pivotal instrument in the pantheon of diameter measurement is the micrometer screw gauge, often revered for its remarkable accuracy. Picture this tool as a precise artist’s brush, allowing the user to exactingly paint minute dimensions onto the canvas of engineering and fabrication. The micrometer functions through a spindle and an anvil mechanism, whereby the item to be measured is cradled between the two. Each revolution of the micrometer’s thimble signifies a predetermined increment, typically one-hundredth of a millimeter, evoking the meticulous nature of a watchmaker tuning the minutiae of timepieces. It is in such milled divisions that we witness the act of measuring transform into an intricate dance with mathematics and engineering.
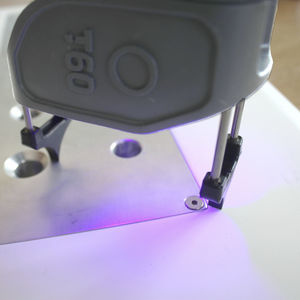
In addition to these classical instruments, laser diameter gauges emerge as a prodigious innovation of modern measurement technology. Utilizing the principles of light, these devices operate by projecting a laser beam onto the object in question. The interaction between the beam and the surface yields data that is then computed to determine diametric dimensions. One might liken this to an artist capturing the essence of a subject through the lens of a camera—wherein the laser, akin to light, reveals the hidden truths of geometry. Laser gauges epitomize expediency without sacrificing precision, making them indispensable in high-velocity manufacturing environments where speed is paramount.
Optical instruments, specifically the optical comparator, also play a significant role in diameter measurement. With the grace of a ballet dancer, these devices project a magnified silhouette of the part onto a viewing screen, allowing engineers to conduct visual inspections and comparisons against prescribed tolerances. This method transcends mere measurement; it delivers an overarching understanding of the part’s geometry as an artistic expression. The optical comparator exemplifies how technology can fold aesthetics into functionality, reminding us that measurement is not solely an act of quantification but also an endeavor steeped in the beauty of design.
In the automotive and aerospace sectors, the advent of bore gauges and dial indicators has revolutionized the measurement of internal diameters. The bore gauge operates similarly to a caliper but is specifically designed to access the hollow interiors of cylindrical components. The mechanics of this instrument mirror the careful exploration of an archaeological dig, revealing the internal dimensions with precision. Each adjustment and retraction navigates through the depths of tubes and cylinders, much like an archaeologist uncovering layers of history.
Meanwhile, dial indicators, whether used alone or in concert with other measuring devices, serve to capture variations in diameter along an axis. Their needles flicker like a heartbeat, reflecting shifts as minute as a nanometer. This real-time feedback not only informs the technician of diameter integrity but also serves as an early warning system against potential defects that threaten operational safety.
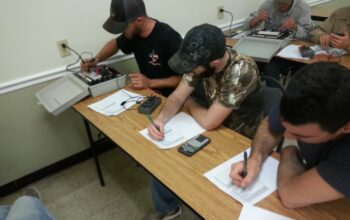
The choice of measurement instrument hinges on several factors, including the context of use, the material characteristics of the workpiece, and the required precision. In an educational setting, calipers are often favored for their capacity to instruct students in the fundamentals of precision measurement; the tactile experience of handling a caliper introduces a hands-on approach to discerning geometrical nuances. Conversely, in industrial applications, the necessity for high-speed and accurate measurements favors the adoption of laser gauges and micrometers.
As we traverse through the various instruments designed to measure diameter, one threads a connection between the physicality of materials and our abstract understanding of dimensions. The interplay between these instruments and their users cultivates a unique rapport, akin to a conversation in which language is transformed into lines of measure. The significance of accurately capturing diameter extends far beyond mere numbers; it embodies a relationship between mankind and the constructs they create. In this intricate ballet of technology, mathematics, and design, the instrument is not merely a tool; it becomes an extension of the engineer’s will, a bridge to precision that resonates through the annals of creation.
